FontCreator Tutorials
Quick Start Tutorial
Written by Erwin Denissen. This article was originally published as part of the user manual. Updated September 16, 2024.
Your First Font – A Brief Guide
The quickest way to explore FontCreator is by creating a font. Let’s make a font of your own handwriting.
Step 1: Create a New Font Project
- In the File menu, click New Project to start a new font project.
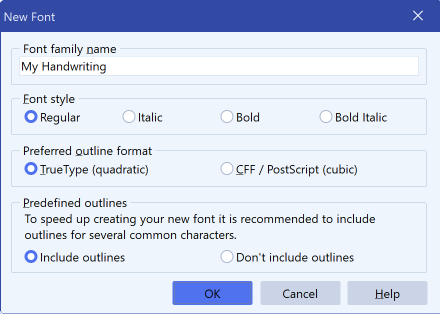
- In the Font family name field, type “My Handwriting” and click OK. This step is important for giving your font a personal name for easy identification.
Step 2: Understanding the Font Overview Window
You’ll now see the Font Overview window. Each cell represents a glyph. Some cells contain sample characters shown as light grey outlines, which serve as visual guides. These are placeholders; you’ll need to add your own glyph data. In this tutorial, we will create glyphs for the characters A, B, and C.
Editing Glyphs
Edit Glyph: Character "A"
- In the Font Overview window, double-click the cell labeled A.
- In the Glyph Edit window, choose Contour from the Insert menu or click the corresponding toolbar button (the one surrounded by a rounded red rectangle in the screenshot provided below).
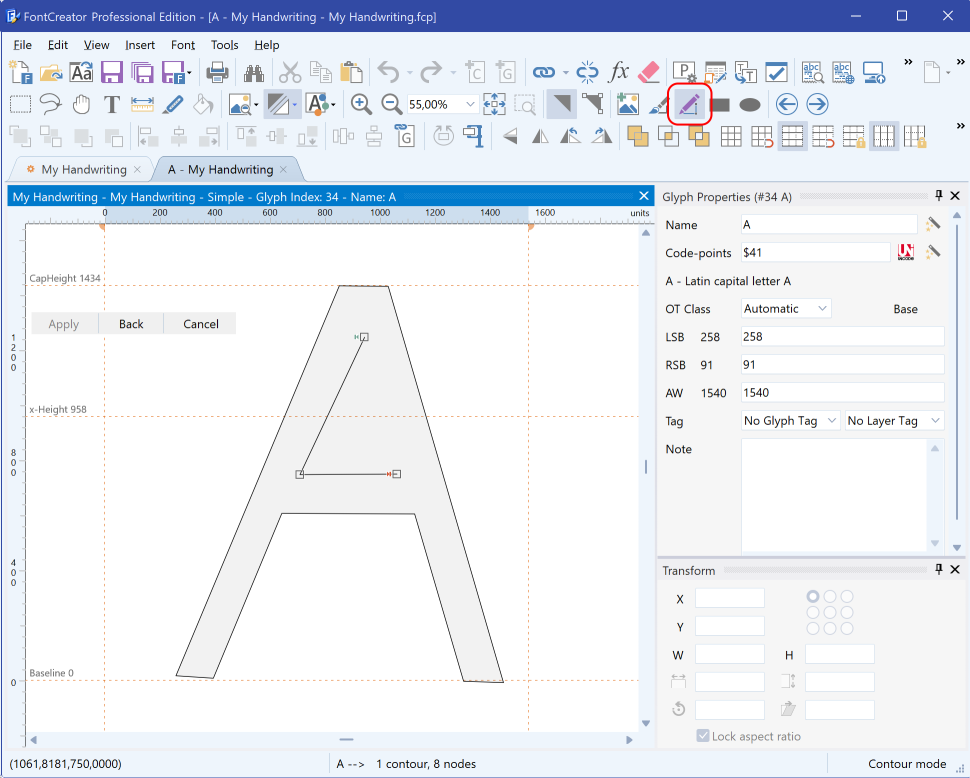
- Click with the left mouse button to add points. To create curves, hold down the mouse button and move it to form a Bézier curve.
- Hold down the Shift key while clicking to generate straight horizontal or vertical lines.
- Press Apply (or click the first point) to complete the contour. You may need to create multiple contours to complete the shape.
- Ensure the contours stay within the visible area defined by the WinAscent, WinDescent lines, and the side-bearings (dashed vertical lines). This ensures the glyph will display correctly. Adjust the side-bearings if needed by dragging them.
- Close the Glyph Edit window.
Edit Glyph: Character "B"
For a personalized touch, we’ll import an image of a handwritten B:
- Prepare an image of your handwritten B with dimensions around 300x300 pixels. Bitmap, GIF, PNG, and JPG formats work well.
- Double-click on the cell labeled B in the Font Overview window.
- From the Tools menu, select Import Image.
- Click Load to select your image, then click Generate. The image will appear in the Glyph Edit window.
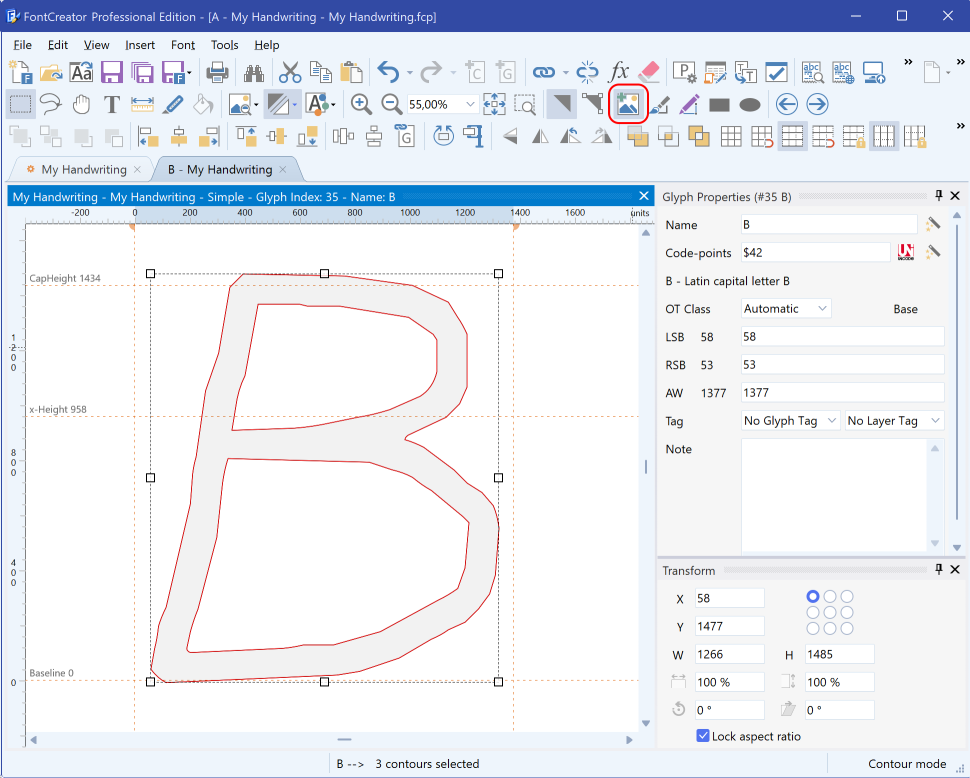
- Adjust the contours and ensure they fit within the visible area.
- Close the Glyph Edit window.
Edit Glyph: Character "C"
- From the Font Overview window, double-click on the cell labeled C. This opens the Glyph Edit window.
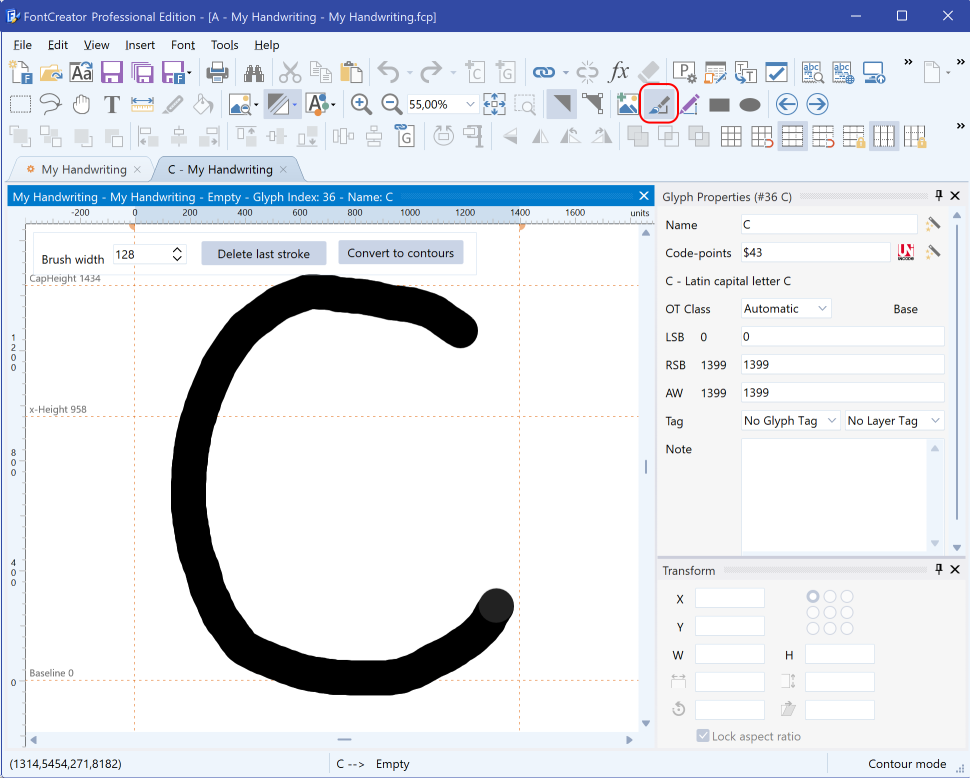
- Choose Free Draw Contours... from the Insert menu or select the Free Draw tool from the Drawing Toolbar.
- Click and drag the left mouse button to draw your glyph, and use the right mouse button to erase parts of it.
- Once done, press Convert to Contours to transform your drawing into editable contours.
- Make sure the contours fit within the visible area, adjusting the side-bearings as necessary.
- Close the Glyph Edit window to return to the Font Overview window.
Step 3: Test Your Font
Now that we’ve created the first three characters, let’s test the font:
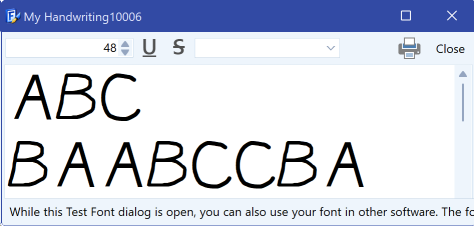
- Go to the Font menu and select Test.
- In the test window, type the characters A, B, and C to view your glyphs.
Step 4: Install and Export Your Font
When you're satisfied with the font, you can install the font for use in other applications. Select Install from the Font menu. The Font Installation Wizard will guide you through the installation process. Once the font is installed, most applications (like Word) will recognize it immediately, though some may require a restart.
To share your font—whether with friends, to sell online, or to use on your website—export it by selecting Export Font from the File menu. In the Font Export Settings window choose your desired format (e.g., TrueType or OpenType) and the export folder.